Install the IDE
Cow Pi mk1e: Arduino Nano form factor
Attention
If you are a Windows user, please review the notes about CH340 USB Driver issues for Windows 10 and Windows 11.
Broadly speaking, you have four options:
Using the Arduino IDE on your personal laptop
Using VS Code with the PlatformIO Plugin on your personal laptop
Using Microsoft Terminal Server on a Terminal Server
Using PlatformIO on a lab computer (this option is not yet available)
Arduino IDE
If you choose to install the Arduino IDE on your personal laptop, you can download it from https://www.arduino.cc/en/software and follow the installation instructions. Alternatively, you can install a browser plugin to use the Arduino Web Editor.
About Arduino Programs
An Arduino program is called a sketch for historical reasons.[1]
For all intents and purposes, you can think of it as a C++ program[2] in which you write two functions, setup() and loop(), along with any helper code that you need.
The file extension for sketches is .ino (as in, Arduino).
The Arduino IDE will compile your sketch and link it to a main() function that looks something like:
int main(void) {
    setup();
    while(true) {
        loop();
    }
}
(The actual main() function[3] also calls a few other functions from the Arduino core library.)
Connect to the Arduino Nano
- :[ ]:
Review the instructions to upload a program.
- :[ ]:
Connect one end of the USB cable to a lab computer or to your personal laptop.[4]
- :[ ]:
Connect the other end of the cable to your Arduino Nano.
The PWR LED will light up, and you may see the L LED repeatedly blink on-and-off.
The L LED is connected to the Arduino Nano’s pin D13, and Arduino microcontroller boards typically leave the factory with Blink.ino loaded, but it does not matter if yours does not have Blink.ino pre-loaded.
// the setup function runs once when you press reset or power the board
void setup(void) {
    // initialize digital pin LED_BUILTIN as an output.
    pinMode(LED_BUILTIN, OUTPUT);
}

// the loop function runs over and over again forever
void loop(void) {
    digitalWrite(LED_BUILTIN, HIGH);   // turn the LED on (HIGH is the voltage level)
    delay(1000);                       // wait for a second
    digitalWrite(LED_BUILTIN, LOW);    // turn the LED off by making the voltage LOW
    delay(1000);                       // wait for a second
}
- :[ ]:
Open the Arduino IDE on the computer that your Arduino Nano is connected to.
- :[ ]:
Connect the Arduino IDE to the Arduino Nano.
Arduino claims that the board and COM port (Windows) or TTY port (Mac/Linux) will be detected automatically. We have found that automatic detection is unlikely with non-official boards.
You will need to select the board and port; on Windows, you may need to select “Show Hidden Ports” (see Fig. 20(a)). With Arduino Nanos, you will also need to select the processor (see Fig. 20(b) and the discussion below).

Fig. 20 Selecting board and processor in the Arduino IDE.
a |
b |
|---|---|
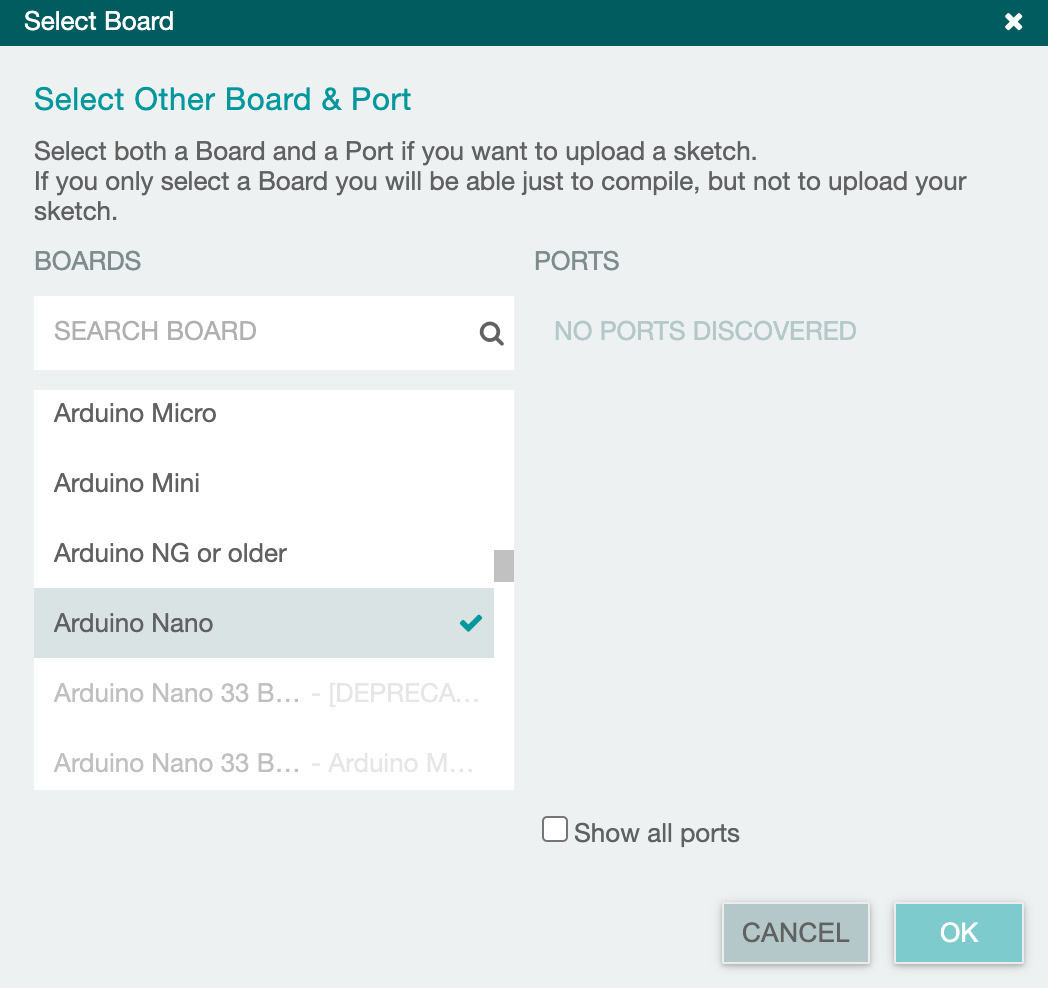
|
|
Selecting the board with Arduino IDE 2.0. |
Selecting the processor after selecting the board. |
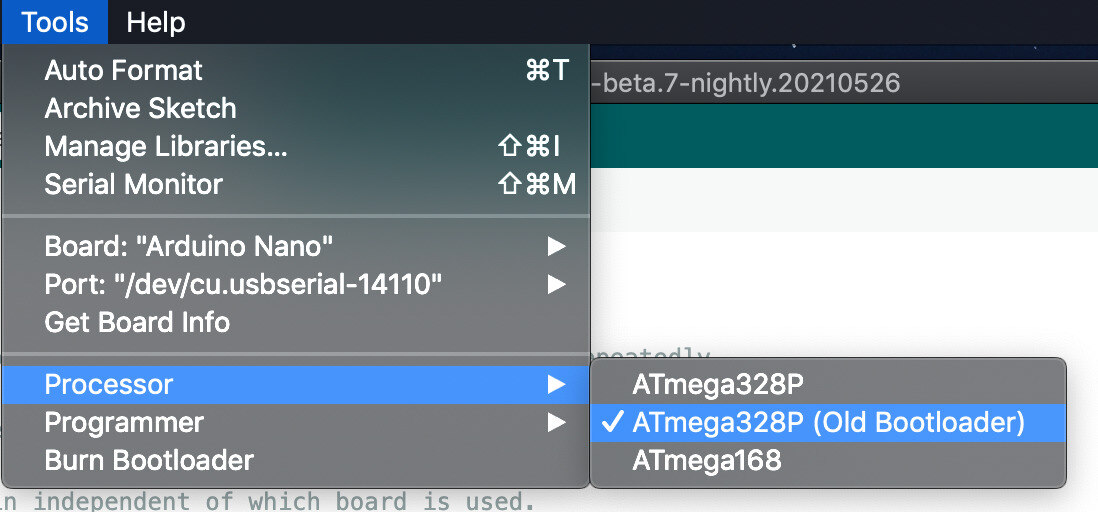
Selecting the Correct “Processor”
There are three choices for the Arduino Nano’s processor, two of which specify the ATmega328P processor. Even though the difference is with the bootloader, it is resolved through the Arduino IDE’s “Processor” selection:
Official Arduino Nanos and some clones use the “new bootloader”. Under the “Tools” menu, when choosing “Processor”, select “ATmega328P”.
Older official Arduino Nanos and some clones use the “old bootloader”. Under the “Tools” menu, when choosing “Processor”, select “ATmega328P (Old Bootloader)”
Very old Arduino Nanos use the ATmega168 processor. If you have such a device, replace it with a newer Arduino Nano.
- :[ ]:
Unless you already know which bootloader your Arduino Nano has, select “ATmega328P.”
Note
On the following pages, some of the Arduino Nanos have a label indicating which bootloader they have. If you have only one Arduino Nano, you do not need to label it; however, if you have many Arduino Nanos, you may find that labeling them will help you keep track of which bootloader to select.
Whether you have an old bootloader or a new bootloader does not affect any steps you need to take, except that you need to select the correct one in order to upload the programs to your Arduino Nano.
Updating Windows USB Driver if Necessary
Official Arduino Nanos use the FT232RL USB interface chip. Most Arduino Nano clones use the CH340 USB interface chip. We have seen some Windows 10 computers without the CH340 USB driver, and we have seen that some Windows 11 computers need their CH340 USB driver updated.
See Troubleshooting Connections to Arduino Nanos for instructions to handle these problems.
If you are unable to get your Windows 11 computer to work with your Arduino Nano, then you should consider using a lab computer or Terminal Server for the I/O labs.
Upload a New Sketch
- :[ ]:
From the Arduino IDE’s File menu, open the Blink.ino example: File ⟶ Examples ⟶ 01.Basics ⟶ Blink
- :[ ]:
Select Save As… and save the project as MyBlink.
- :[ ]:
Edit the values in the
delay()calls to change the delays between the LED turning on, off, and on again. Select values that will visibly have a difference, such as 250 or 2000.- :[ ]:
Compile the program using the “Verify” checkmark in the IDE’s toolbar and make corrections if the program doesn’t compile.
- :[ ]:
Upload the program to your Arduino Nano using the “Upload” arrow in the IDE’s toolbar. (If you forget to compile first, the IDE will compile your program before uploading, but I find it useful to find compile-time mistakes before attempting to upload the program.)
If you successfully uploaded MyBlink.ino then you will see the following in the IDE’s Output window:
avrdude: AVR device initialized and ready to accept instructions

Reading | ################################################## | 100% 0.01s

avrdude: Device signature = 0x1e950f (probably m328p)
avrdude: reading input file "/var/folders/p7/lx4gt70d0_34cpy8r0j3c95c0000gp/T/arduino-sketch-11A4823C54657006C9F78B0812B621A8/MyBlink.ino.hex"
avrdude: writing flash (932 bytes):

Writing | ################################################## | 100% 0.33s

avrdude: 932 bytes of flash written

avrdude done.  Thank you.


--------------------------
upload complete.
and then the LED’s on-off pattern will change, reflecting the
delay()values you assigned.
If you did not successfully upload MyBlink.ino then you will see the following in the IDE’s Output window:
...
- :[ ]:
If you did not successfully upload MyBlink.ino, then change your “Processor” selection to “ATmega328P (Old Bootloader)”.
- :[ ]:
Upload the program to your Arduino Nano using the “Upload” arrow in the IDE’s toolbar.
Handling Errors
If you get an error when attempting to upload a sketch that is not resolved by changing the “Processor” selection, see Troubleshooting Connections to Arduino Nanos for guidance to handle these problems.
If, instead of an error, your IDE “hangs” while collecting configuration data, try this corrective measure:
Press the
RESETbutton in the middle of the Arduino Nano; the IDE should begin uploading the sketch after you release the button.
Attention
CHECKPOINT 2 | Before proceeding further, have a TA, a classmate, or a friend verify that you have correctly uploaded new code to the Arduino Nano. Update your checkpoints.txt file to indicate who checked your work and when they did so.
If you are satisfied with using the Arduino IDE, then proceed to Connect Power and Ground to Power Bus Strips.
Microsoft Terminal Server
- :[ ]:
Download and install the VMWare Horizon Client.
- :[ ]:
Using the VMWare Horizon Client, connect to cse-vmcs-01.unl.edu and login with your
@unl.educredentials.- :[ ]:
After you log in you should have an item called “Terminal Server” that you can select.
- :[ ]:
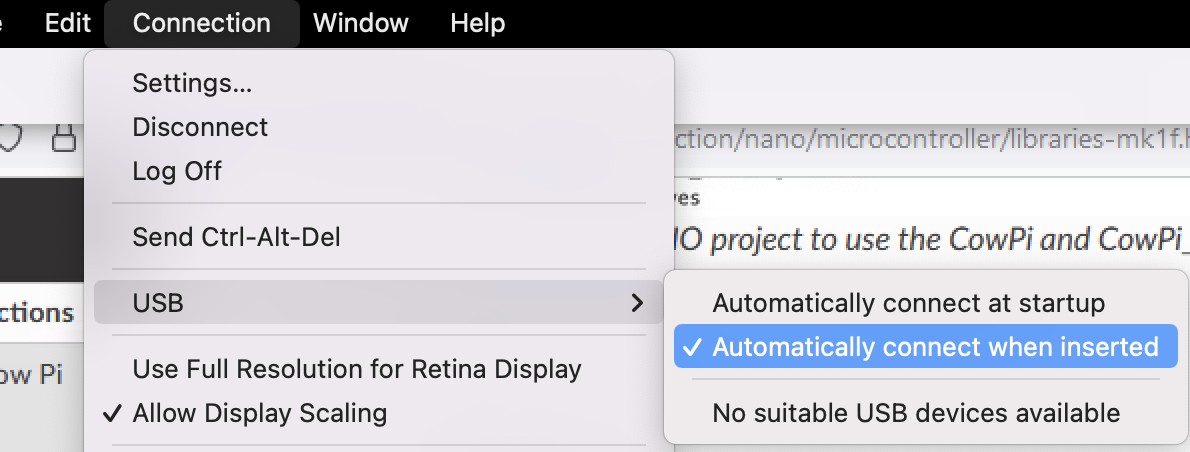
After you have reached the Terminal Server’s Windows desktop, and before you plug in your Arduino, enable USB forwarding by going to the VMWare menu and selecting Connections ⟶ USB ⟶ Automatically connect when inserted.
Proceed to the Section about VS Code with the PlatformIO Plugin.
VS Code with the PlatformIO Plugin
If you are using your personal laptop
If you have not already installed VS Code, then download and install it.
You may want to take a quick look at the parts of the PlatformIO Toolbar.
About PlatformIO and the Arduino Framework
PlatformIO is able to work with many frameworks;
for the I/O labs, we will use the Arduino framework.
As application programmers, the starting point is a C++ program[2] in which you write two functions, setup() and loop(), along with any helper code that you need.
PlatformIO will compile your program and link it to a main() function that looks something like:
int main(void) {
    setup();
    while(true) {
        loop();
    }
}
(The actual main() function[3] also calls a few other functions from the Arduino core library.)
Connect to the Arduino Nano
- :[ ]:
Connect one end of the USB cable to a lab computer or to your personal laptop.[4]
- :[ ]:
Connect the other end of the cable to your Arduino Nano.
The PWR LED will light up, and you may see the L LED repeatedly blink on-and-off.
The L LED is connected to the Arduino Nano’s pin D13, and Arduino microcontroller boards typically leave the factory with Blink.ino loaded, but it does not matter if yours does not have Blink.ino pre-loaded.
// the setup function runs once when you press reset or power the board
void setup(void) {
    // initialize digital pin LED_BUILTIN as an output.
    pinMode(LED_BUILTIN, OUTPUT);
}

// the loop function runs over and over again forever
void loop(void) {
    digitalWrite(LED_BUILTIN, HIGH);   // turn the LED on (HIGH is the voltage level)
    delay(1000);                       // wait for a second
    digitalWrite(LED_BUILTIN, LOW);    // turn the LED off by making the voltage LOW
    delay(1000);                       // wait for a second
}
- :[ ]:
Open VS Code on the computer that your Arduino Nano is connected to.
On VS Code’s left-side menu, you will see a bug head icon; this is PlatformIO’s logo.

- :[ ]:
Click on the PlatformIO logo.
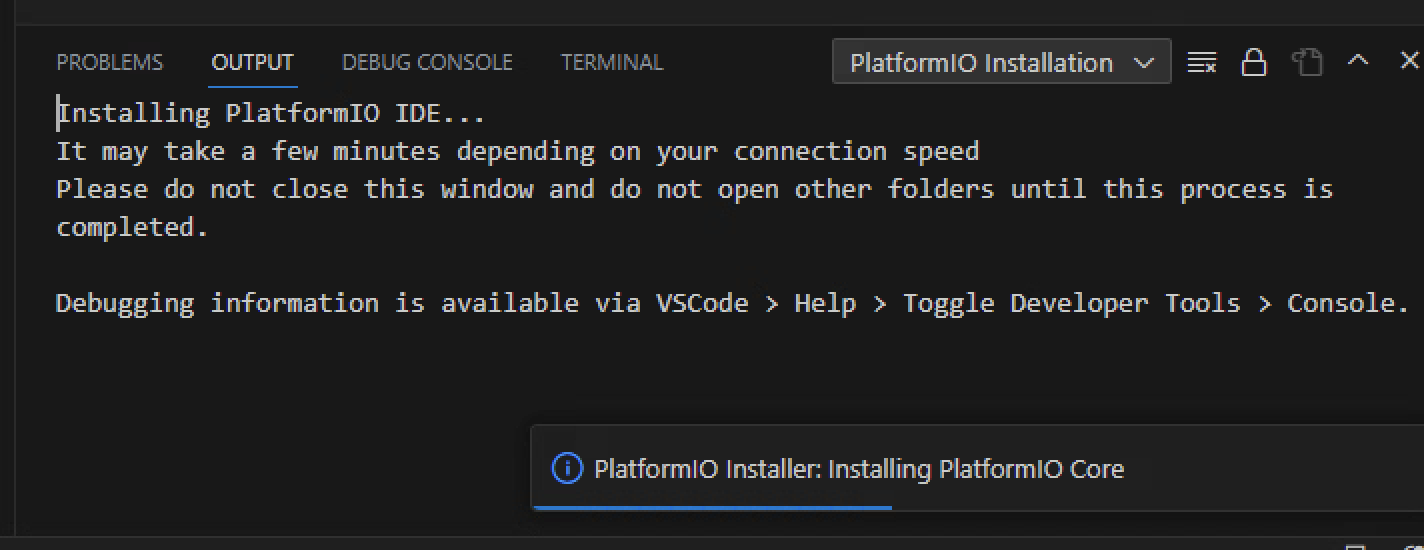
If you are using the Terminal Server
The first time you click on the PlatformIO logo on the Terminal Server, you will need to wait a few minutes while PlatformIO finishes its installation.
After a few seconds, a PlatformIO side-window will appear.
- :[ ]:
In that side-window, click on the “Create New Project” button.
This takes you to the “PlatformIO Home.”
- :[ ]:
In the PlatformIO Home, under “Quick Access,” click on the “+ New Project” button.
- :[ ]:
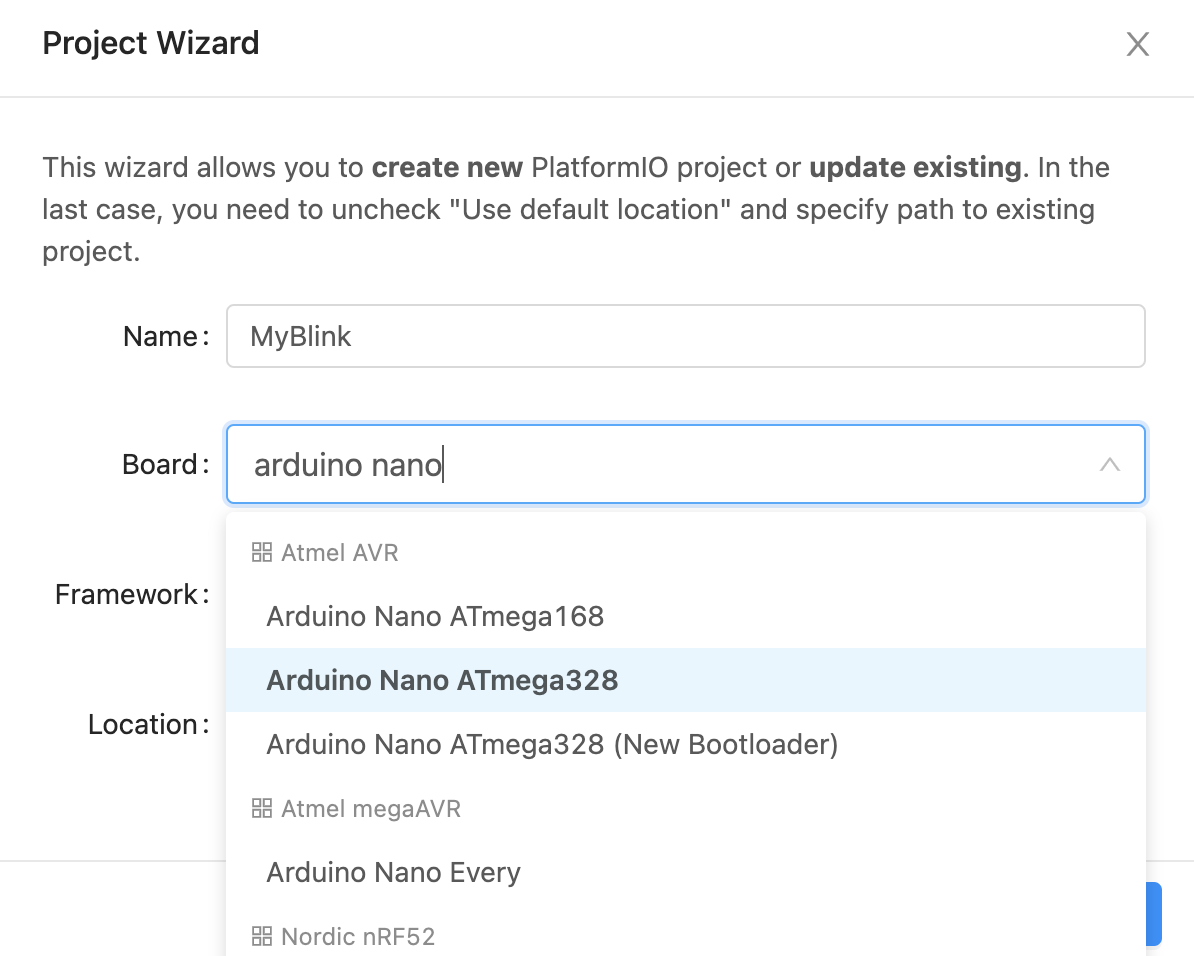
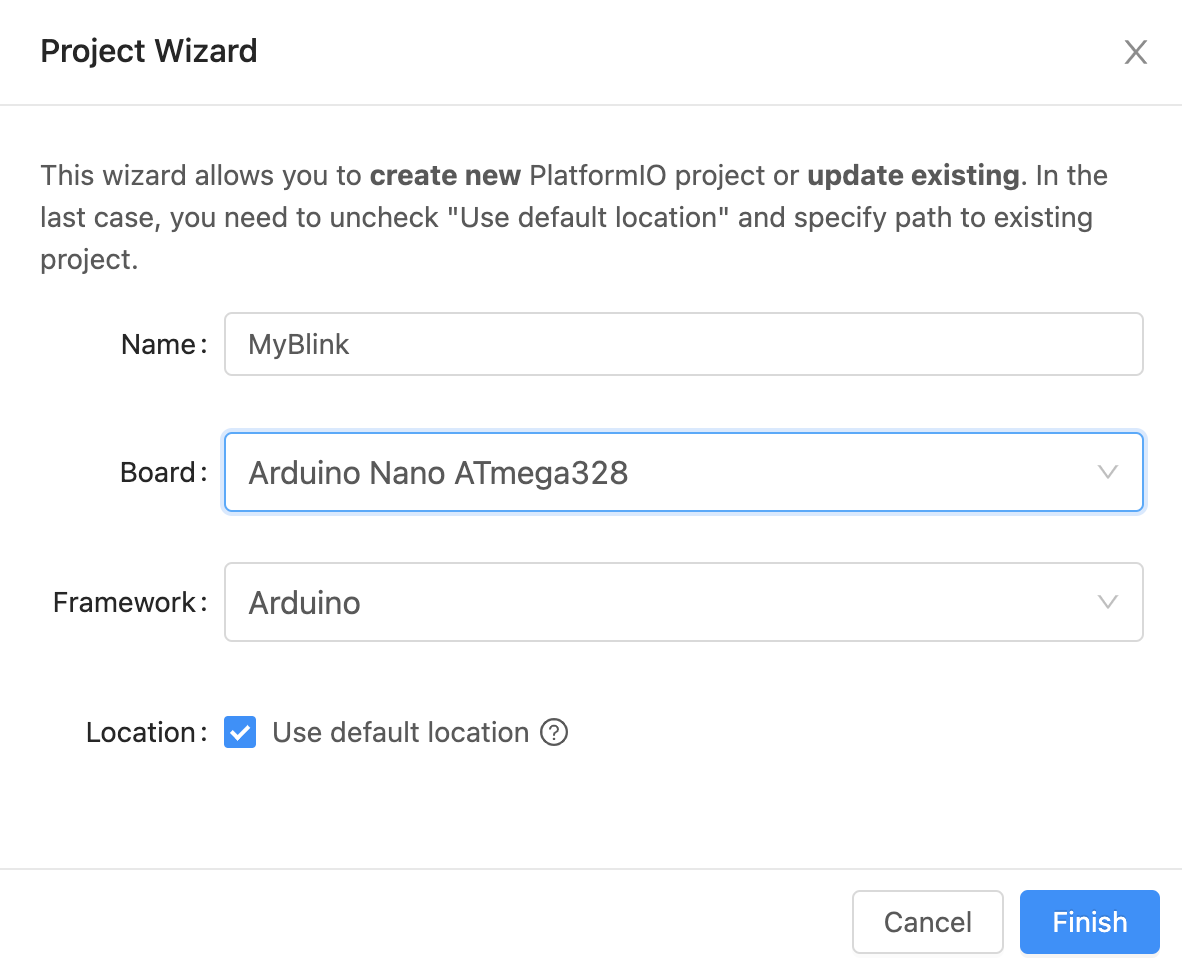
In resulting pop-up window, name the project MyBlink. In the “board” field, type arduino nano (Fig. 21(a)).
- :[ ]:
Unless you already know which bootloader your Arduino Nano has, select “Arduino Nano ATmega328.” After you do so, the “framework” field will auto-populate to “Arduino” (Fig. 21(b)).
Fig. 21 Selecting board and processor in the Arduino IDE.
a |
b |
|---|---|
|
|
Selecting the board with PlatformIO. |
Ready to create a new project using PlatformIO. |
- :[ ]:
Click on the “Finish” button. After several seconds, a new project will be ready.
- :[ ]:
Open the platformio.ini file (it may open automatically).
- :[ ]:
Unless you already know which bootloader your Arduino Nano has, delete the entire contents of platformio.ini and replace it with:
[env:nanoatmega328old]
platform = atmelavr
board = nanoatmega328
framework = arduino

[env:nanoatmega328new]
platform = atmelavr
board = nanoatmega328new
framework = arduino
- :[ ]:
Save the updated platformio.ini file.
- :[ ]:
Open the src/main.cpp file.
- :[ ]:
Delete the entire contents of main.cpp and replace it with:
#include <Arduino.h>

// the setup function runs once when you press reset or power the board
void setup(void) {
    // initialize digital pin LED_BUILTIN as an output.
    pinMode(LED_BUILTIN, OUTPUT);
}

// the loop function runs over and over again forever
void loop(void) {
    digitalWrite(LED_BUILTIN, HIGH);   // turn the LED on (HIGH is the voltage level)
    delay(1000);                       // wait for a second
    digitalWrite(LED_BUILTIN, LOW);    // turn the LED off by making the voltage LOW
    delay(1000);                       // wait for a second
}
- :[ ]:
Save the updated main.cpp file.
Determine Which Bootloader your Arduino Nano has
A few years ago, Arduino changed the bootloader in the Official Arduino Nano. Some clones now ship with the “new” bootloader, and some clones still ship with the “old” bootloader. In the previous step, you told PlatformIO that you might have an Arduino Nano with the old bootloader and you might have an Arduino Nano with the new bootloader. Now you will determine which bootloader you have.
The PlatformIO Toolbar has a few options.

The house icon takes you to the PlatformIO Home
The checkmark icon compiles your program
The arrow icon uploads your program to your Arduino Nano
The trash can icon deletes your program’s compiled firmware
The beaker icon runs unit tests
The plug icon opens a Serial Monitor to interact with programs on your Arduino Nano
The box with an angle bracket opens a command-line terminal
On the right, where it currently says “Default,” is the PlatformIO Environment selector.
- :[ ]:
Click on the checkmark icon to compile the program.
So long as the PlatformIO Environment is “default,” PlatformIO will compile the program for both types of Nano you told it about.
…(elided compiler logs)…

Environment       Status    Duration
----------------  --------  ------------
nanoatmega328old  SUCCESS   00:00:05.381
nanoatmega328new  SUCCESS   00:00:04.735
========================================================================= 2 succeeded in 00:00:10.116 =========================================================================
 *  Terminal will be reused by tasks, press any key to close it.
- :[ ]:
Clock on the arrow icon to upload the program to your Arduino Nano.
So long as the PlatformIO Environment is “default,” PlatformIO will attempt to upload the program to both types of Nanos. Since you have only one Arduino Nano connected to your computer, one of those attempts must fail. This example shows the output from attempting to upload to a Arduino Nano with the new bootloader:
Executing task: platformio run --target upload

Processing nanoatmega328old (platform: atmelavr; board: nanoatmega328; framework: arduino)
-------------------------------------------------------------------------------------------------------------------------------------------------------------------------------------

…(elided configuration data)…

Looking for upload port...
Auto-detected: /dev/cu.usbserial-141330
Uploading .pio/build/nanoatmega328old/firmware.hex
avrdude: stk500_recv(): programmer is not responding
avrdude: stk500_getsync() attempt 1 of 10: not in sync: resp=0x00
avrdude: stk500_recv(): programmer is not responding
avrdude: stk500_getsync() attempt 2 of 10: not in sync: resp=0x00
avrdude: stk500_recv(): programmer is not responding
avrdude: stk500_getsync() attempt 3 of 10: not in sync: resp=0x00
avrdude: stk500_recv(): programmer is not responding
avrdude: stk500_getsync() attempt 4 of 10: not in sync: resp=0x00
avrdude: stk500_recv(): programmer is not responding
avrdude: stk500_getsync() attempt 5 of 10: not in sync: resp=0x00
avrdude: stk500_recv(): programmer is not responding
avrdude: stk500_getsync() attempt 6 of 10: not in sync: resp=0x00
avrdude: stk500_recv(): programmer is not responding
avrdude: stk500_getsync() attempt 7 of 10: not in sync: resp=0x00
avrdude: stk500_recv(): programmer is not responding
avrdude: stk500_getsync() attempt 8 of 10: not in sync: resp=0x00
avrdude: stk500_recv(): programmer is not responding
avrdude: stk500_getsync() attempt 9 of 10: not in sync: resp=0x00
avrdude: stk500_recv(): programmer is not responding
avrdude: stk500_getsync() attempt 10 of 10: not in sync: resp=0x00

avrdude done.  Thank you.

*** [upload] Error 1
============================================================================ [FAILED] Took 53.28 seconds ============================================================================

Processing nanoatmega328new (platform: atmelavr; board: nanoatmega328new; framework: arduino)
-------------------------------------------------------------------------------------------------------------------------------------------------------------------------------------

…(elided configuration data)…

Looking for upload port...
Auto-detected: /dev/cu.usbserial-141330
Uploading .pio/build/nanoatmega328new/firmware.hex

avrdude: AVR device initialized and ready to accept instructions

Reading | ################################################## | 100% 0.00s

avrdude: Device signature = 0x1e950f (probably m328p)
avrdude: reading input file ".pio/build/nanoatmega328new/firmware.hex"
avrdude: writing flash (924 bytes):

Writing | ################################################## | 100% 0.18s

avrdude: 924 bytes of flash written
avrdude: verifying flash memory against .pio/build/nanoatmega328new/firmware.hex:
avrdude: load data flash data from input file .pio/build/nanoatmega328new/firmware.hex:
avrdude: input file .pio/build/nanoatmega328new/firmware.hex contains 924 bytes
avrdude: reading on-chip flash data:

Reading | ################################################## | 100% 0.14s

avrdude: verifying ...
avrdude: 924 bytes of flash verified

avrdude: safemode: Fuses OK (E:00, H:00, L:00)

avrdude done.  Thank you.

============================================================================ [SUCCESS] Took 3.02 seconds ============================================================================

Environment       Status    Duration
----------------  --------  ------------
nanoatmega328old  FAILED    00:00:53.277
nanoatmega328new  SUCCESS   00:00:03.024
======================================================================= 1 failed, 1 succeeded in 00:00:56.300 =======================================================================

 *  The terminal process "platformio 'run', '--target', 'upload'" terminated with exit code: 1.
 *  Terminal will be reused by tasks, press any key to close it.
If the Arduino Nano were a Nano with the old bootloader, then the upload for “nanoatmega328new” would have failed:
…(elided most of the output)…

Environment       Status    Duration
----------------  --------  ------------
nanoatmega328old  SUCCESS   00:00:02.979
nanoatmega328new  FAILED    00:00:52.333
======================================================================= 1 failed, 1 succeeded in 00:00:55.312 =======================================================================
Tip
If the uploads for both bootloaders fail, then try uploading again before attempting any other Troubleshooting Connections to Arduino Nanos.
- :[ ]:
On the PlatformIO Toolbar, click on the PlatformIO Environment selector (which currently says “Default”).
At the top of VS Code, you will see the environment options.

Select whichever environment SUCCESSfully uploaded the program to your Arduino Nano.
Note
On the following pages, some of the Arduino Nanos have a label indicating which bootloader they have. If you have only one Arduino Nano, you do not need to label it; however, if you have many Arduino Nanos, you may find that labeling them will help you keep track of which bootloader to select.
Whether you have an old bootloader or a new bootloader does not affect any steps you need to take, except that you need to select the correct one in order to upload the programs to your Arduino Nano.
Modify and Upload the Program
- :[ ]:
In src/main.cpp, edit the values in the
delay()calls to change the delays between the LED turning on, off, and on again. Select values that will visibly have a difference, such as 250 or 2000.- :[ ]:
Compile the program.
Now that a specific PlatformIO Environment is selected, PlatformIO will compile the program only for that environment.
- :[ ]:
Upload the program to your Arduino Nano.
Now that a specific PlatformIO Environment is selected, PlatformIO only attempt to upload the program to a Arduino Nano with the correct bootloader.
The LED’s on-off pattern will change, reflecting the delay() values you assigned.
Handling Errors
If you get an error when attempting to upload a program, see Troubleshooting Connections to Arduino Nanos for guidance.
Attention
CHECKPOINT 2 | Before proceeding further, have a TA, a classmate, or a friend verify that you have correctly uploaded new code to the Arduino Nano. Update your checkpoints.txt file to indicate who checked your work and when they did so.
If you are satisfied with using the Arduino IDE, then proceed to Connect Power and Ground to Power Bus Strips.